Normally the manufacturer encloses a product description with the microphone. It is a good idea to read the description carefully and prepare a focussed test of the manufacturer's listed features and of the product specifications. Make sure you are using the product for an appropriate application. If no graphs or curves are enclosed with the literature do not hesitate to contact the manufacturer for this information.
Choosing a reference microphone for the test
The reference microphone is often chosen for more personal reasons - "My favourite microphone", than for scientific/application comparability. Make sure the manufacturer has informed you about the purpose, application and characteristics for the test microphone and then choose the most appropriate microphone according to the application. A more scientific approach is to also use a true reference microphone i.e. a measurement microphone, such as a DPA Type 4007 or Type 4006. The probe-like design of these microphones enables them to be positioned extremely close to the test microphone without any influence on the sound field. Furthermore these microphones have totally linear frequency and phase responses, which will help you to "calibrate" your ears in between listening to other microphones.
Positioning the test and reference microphones
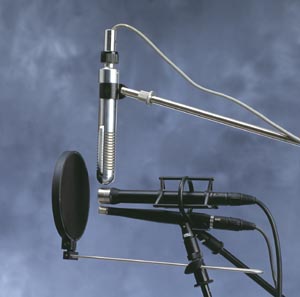
It is important to bear in mind that the acoustic memory of the human being is only a few seconds, which leads to the so-called simultaneous A-B test or A-B-C test if more microphones are to be considered. The microphones need to be present simultaneously, picking up exactly the same sound source. You need to align the test and reference microphones bringing the diaphragms as close to the same point as possible. Note that the distance to the sound source needs to be at least four (4) times greater than the maximum distance between the centres of the microphone diaphragms. Some microphone housings and bodies are quite bulky. Use one microphone stand for each microphone in the set-up to find a position, which ensures a minimum influence on the acoustic field around the diaphragms from the more bulky microphone bodies. Do not hesitate to use a pop-filter if you intend to test the microphone with vocals, but use one pop-filter only.
Testing microphones with vocals
The most common tests of studio microphones are done with vocals, but do not hesitate to use more complex sound sources like guitar, piano, and wind or percussion instruments to spice up your evaluation. Most microphones at least have a decent on-axis response and you will only be able to evaluate the true quality of a microphone if you also test its off-axis qualities. Musical instruments are extremely qualified sound sources for testing both the on- and off-axis qualities of microphones simultaneously, but you can also get a good idea of the microphone's performance when using speech or singing using the following procedure. Make sure the headphone feed is from one microphone only, as it could otherwise influence the vocalist's performance.
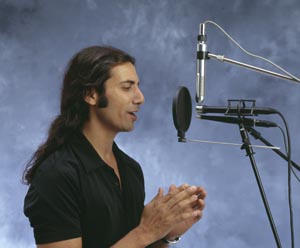
30 cm on-axis (Reference position)
Start here. This is more or less the normal distance to a studio microphone when used for vocals. Adjust the sensitivity on test and reference microphones to exactly the same level using voice or tone generation as the sound source, double-checking the levels with the peak meters in the console. Make sure that all equalizers are bypassed or in neutral position. Select the microphone you want to listen to listen to by using the MUTE button in the console - not by using the faders. If you send a feed to the vocalist's headphones the MUTE function will also mute the AUX SENDS on most consoles, in these cases find alternative ways to switch the MUTE function on, again not using the faders (i.e. using the L+R routing function).
In the reference position you will probably have some kind of preference of what an uncoloured voice should sound like. Here a directional microphone (i.e. a cardioid, hyper-cardioid or a figure-of-eight microphone) will normally not exhibit any or very little proximity effect. The weighting of the lower frequencies can therefore be expected to be neutral if you are testing a directional microphone. An omnidirectional microphone will not be influenced by the proximity effect, regardless of the distance, but you will use this distance as reference anyhow. The reference position will help you to discover any unwanted off-axis coloration when you move around the microphone later on. Return to the reference position as often as you like during your test to calibrate your ears.
